- Icebox Watermelon Growing Guide: How To Grow It In Your Garden - August 21, 2021
- Duke Blueberry Growing Guide: How To Start Your Blueberry Garden? - August 21, 2021
- Pink Hibiscus Growing Guide: How To Grow One Easily? - August 16, 2021
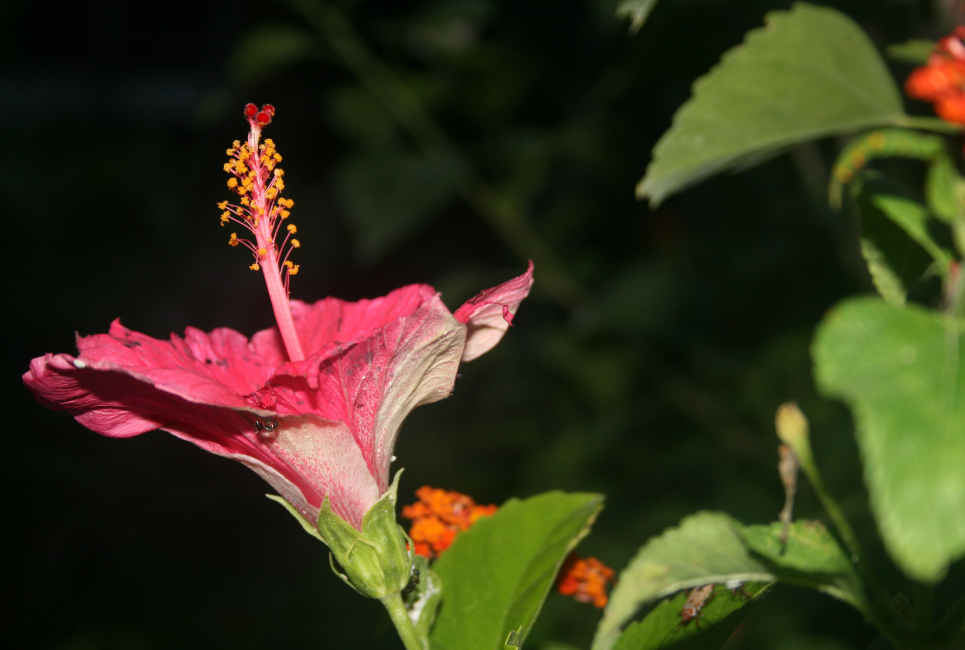
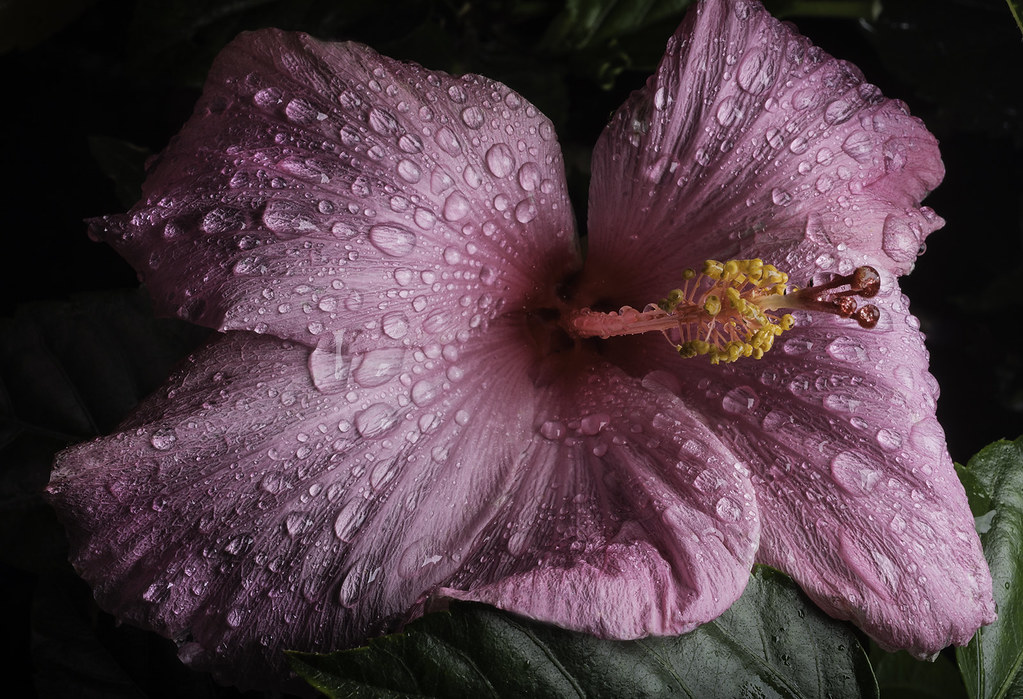
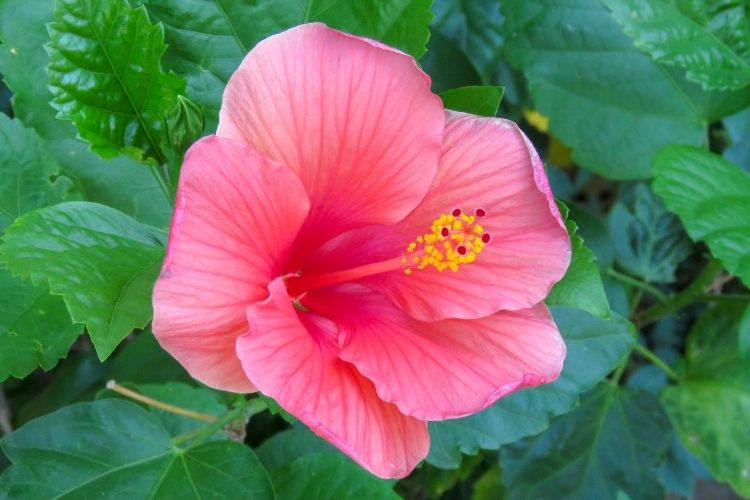
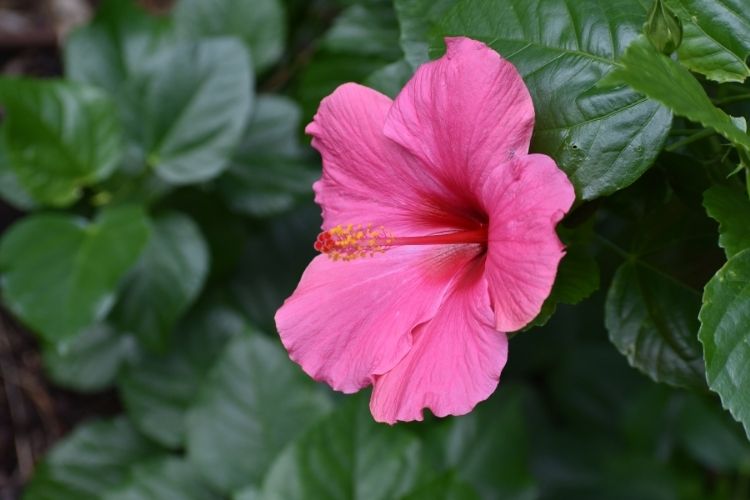
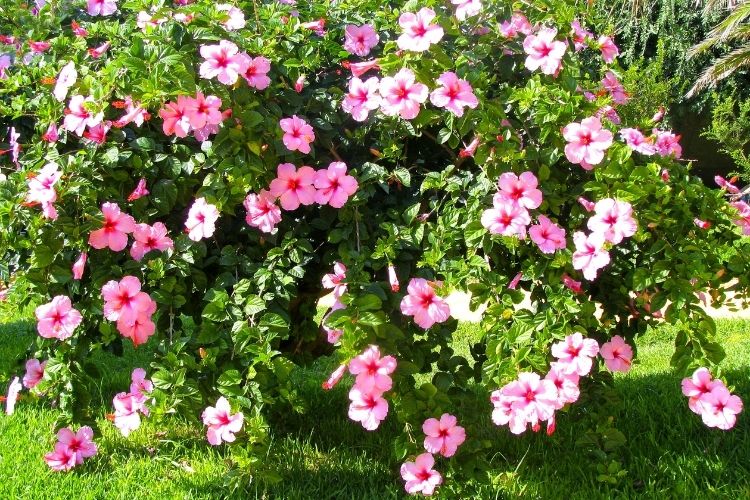
When you think of tropical flowers, do you picture a pale pink bloom the size of a dinner plate? While there are many different varieties to consider, Pink Hibiscus plants are among the most recognizable. There’s a reason that these beautiful bloomers have graced postcards from warm-weather locales like Florida and Hawaii for decades. They’re exotic, easy to grow and deliver show-stopping color.
Whether you live in paradise or you just want to imagine that you do, this is the ideal plant to add to your landscape. To help you get started, we’re sharing our ultimate Pink Hibiscus Growing Guide, easy enough for even the most novice beginner!
What Is a Pink Hibiscus?
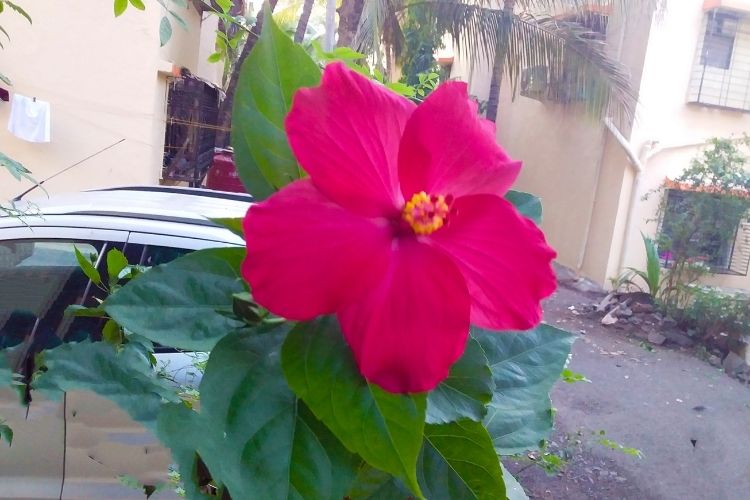
While they’re relatively easy to recognize, there’s a lot more to a Pink Hibiscus than meets the eye. This is a type of evergreen shrub that also goes by the name Chinese Hibiscus or Tropical Hibiscus. Its technical name is Hibiscus moscheutos.
Some of the most common pink-flowered hibiscus plant cultivars include:
- Lady Baltimore Hibiscus
- Disco Belle Pink Hibiscus
- Anne Arundel Hibiscus
While the exact origin of this plant is unknown, it has been cultivated for thousands of years around China, Japan, and other parts of Asia. In those regions, Pink Hibiscus plants are known to symbolize friendship, as well as different types of love.
One of the most heat-tolerant plant varieties available, this is an excellent choice for homeowners who live in a warmer climate. While individual plants can be grouped close together to form a hedge, it is most often used as a container plant.
Wondering if this plant would work well around your property? It flowers best in USDA Hardiness Zones 9 through 11, and this is one feature you’ll want to highlight.
The disc-shaped blooms from a Pink Hibiscus can measure up to 12 inches in diameter and look beautiful contrasted against the dark green foliage! Depending on the specific cultivar that you choose, the plant itself can grow up to five feet tall or taller.
Planting a Pink Hibiscus: A Step-by-Step Guide
Once you purchase a Pink Hibiscus plant, you’ll naturally be eager to watch it thrive. Thankfully, it’s easy to get started.
Whether you choose to plant in a container or in the ground, make sure to choose a location that’s visible from the inside of your home. These pretty plants attract all kinds of interesting visitors, including butterflies and hummingbirds!
Planting From Seed
Once any type of tropical hibiscus plant (including a Pink Hibiscus) has been pollinated, it takes about two months for the plant to develop one seed pod. For that pod to thrive, certain environmental conditions must be in places, such as consistently high temperature and humidity levels.
Once you’ve gathered the seeds from your plan, it’s critical to place them directly into their new growing environment. You can create a clean and sterile setup at home by using perlite. They also need bottom heat to be encouraged to grow.
If you go this route, be patient and prepare to wait. Tropical hibiscus seeds can take up to 18 months or longer to germinate. Then, once they’re on their way, you may still need to adjust your expectations. As hibiscus plants are commonly hybridized, the plant formed from the new seeds may look significantly different from the parent plant.
Planting in a Container
As mentioned, most homeowners prefer to plant their hibiscus plants in a container. This way, they can bring them indoors if the weather gets too cold and becomes intolerable. If a hard frost occurs in your area, an in-ground plant will proceed to die back. Don’t worry though — it will regrow in the spring!
When you’re ready to create a stunning container arrangement, here are the steps to follow:
- Choose a container big enough to allow the plant to grow and spread.
- Fill the container halfway with potting soil.
- Using your hands or a trowel, create a hole in the soil that’s slightly larger than the root ball.
- Carefully remove the Pink Hibiscus from its original container and place it in the hole.
- Fill the container the rest of the way up with potting soil.
- Water thoroughly to settle the plant.
To ensure consistent flower production, try to avoid a container that’s too deep. While these might look tall and impressive, they can direct your plant’s energy solely to root development. As it works overtime in that area, it might fail to produce any flowers. Ideally, look for a pot that’s wide and shallow, so your plant can spread out.
Planting in the Ground
Do you need an attractive way to fill up a blank wall? Want to disguise an unsightly fence or create a backyard oasis by your swimming pool? If you live in the right climate, then you can plant your Pink Hibiscus in the ground.
To do so, follow these steps:
- Using a shovel or trowel, dig a hole that is as deep as the plant’s root ball and about two to three times as wide.
- Carefully remove your hibiscus plant from its container and place it in the hole.
- Refill the hole with soil until it reaches the base of the stem.
- Water the plant thoroughly.
If you’re planting your Pink Hibiscus in the ground, then be sure to give each one plenty of room to spread out. Allowing two to three feet of space between each one is ideal. Keep in mind that some tropical hibiscus plants (like the Pink Hibiscus) have been known to live for up to 40 years or longer! Leave enough room around your plant to allow it to develop into a mature shrub over time.
Pink Hibiscus Growing Guide: What Does This Plant Need?
As any successful plant parent will tell you, each variety is different. What works for one type of hibiscus might not work for the other. That’s why it’s critical to understand exactly what a Pink Hibiscus needs to thrive. Let’s take a look at a few of the key considerations to keep in mind.
Sunlight Requirements
Pink Hibiscus plants are tropical plants and can handle long durations of direct sunlight. However, they do need a little reprieve. If they’re exposed to direct sun for too long, they can get sunburned.
Ideally, set your container in a spot around your home that gets between four to six hours of sunlight per day, and ambient sunlight during the remaining waking hours. If you’re planting them in the ground, then the same applies. For most homeowners, this means choosing a spot on the west or south side of their garden or patio.
Looking for a little shade? These plants will thrive if planted under taller trees, as long as they can still get a significant amount of diffused light.
Soil Requirements
Drainage is the top priority when you’re preparing the soil for your Pink Hibiscus. If you decide to plant it in the ground, then look for an area in your yard or garden that can effectively drain. If water is allowed to pool at the plant’s roots, then it could lead to root rot.
Not sure if the spot you’ve chosen will drain well? You can test this quality at home in a few steps:
- Dig a hole in the prospective planting spot.
- Pour a gallon of water into the hole.
- Watch the water to see when it disappears.
If the water disappears within the hour, then drainage is sufficient and the soil is appropriate. If some (or all) of the soil is still standing after that much time lapses, then it needs amending. This could be a sign that there isn’t enough clay in the soil. Conversely, you may need to add clay to the soil if you find that the water drains out of it too quickly.
The same theory applies to a Pink Hibiscus planted in a container. Shop around for a quick-draining potting mix to ensure that your plant gets the drink it needs, but never drowns. In terms of soil pH, remember that most hibiscus plants (including this one) like slightly acidic soil.
If you perform an at-home soil acidity test and find that yours measures above 6.5 on the pH scale, then you’ll need to make the soil more acidic. You can do so by using a store-bought soil acidifier. Or, you can purchase a bag of sphagnum peat at your local home and garden soil to achieve a similar effect.
On the other hand, you may find that your soil is too basic. In this case, the addition of peat moss should help you reach your desired levels.
Temperature Requirements
If possible, wait to plant your Pink Hibiscus when all winter weather has officially ended. Once spring has arrived and outdoor temperatures remain steady at 60 degrees Fahrenheit to 70 degrees Fahrenheit, you should be in the clear.
One very important note: Your Pink Hibiscus could cease to grow if temperatures drop below 55 degrees Fahrenheit. At temperatures lower than 45 degrees Fahrenheit, it could die. Monitor the weather in between seasons and bring the plant indoors if there’s an unseasonal cold snap. While hardy hibiscus varieties can withstand such drastic dips in temperature, tropical plants like the Pink Hibiscus cannot.
Water Requirements
During the hottest peak season, you will likely need to water your Pink Hibiscus on a daily basis. Try to make sure the soil stays consistently moist but is never soaking wet.
As soon as it begins to dry out, this can weaken your plant’s structure. With too much sun and not enough water, it won’t be long before your Pink Hibiscus begins to shrivel and wilt. While most tropical hibiscus flowers only last for one or two days, you may find that yours don’t even make it quite that long!
When the plant goes dormant in the winter, you can obviously scale back on your watering schedule. During that time, only water when the soil feels excessively dry.
Fertilizer Requirements
A few weeks to a few months before you plant your Pink Hibiscus, go ahead and enrich the soil by adding garden compost to the dirt. Once the plant is in place, you can fertilize it routinely using a commercial plant fertilizer that includes large quantities of potassium and low levels of phosphorous.
A few fertilizers that have this balance of nutrients include 10-4-12 mixtures and 9-3-13 mixtures.
How to Prune a Pink Hibiscus
Left to grow unattended, a Pink Hibiscus plant could soar up to five feet in the air! While some homeowners might adore this towering effect, others may prefer a more controlled look. In either case, it’s important to know how to prune your Pink Hibiscus. Whether you give it an all-out haircut or a simple trim, this step is actually essential for its long-term growth and longevity.
When you cut away old or dying areas on the plant, you help promote new growth and encourage new flowers to appear.
While there are several techniques you could take when it’s time to prune your plant, all of them have one aspect in common: cutting branches above a leaf joint, also called a node. When it’s time to make the final snip, angle your pruners away from the center of the plant.
When you do so, your Pink Hibiscus receives a signal that tells it to produce a new branch or flower in that same location. Then, when this growth appears, it will be focused outward and away from the center of the plant. As a general rule, try not to cut more than two-thirds of a branch at a time.
In addition to preventative pruning, you’ll also need to be as reactive as possible. If you notice any part of your plant that appears to be dead or damaged, go ahead and cut it off. This way, it isn’t absorbing any nutrients that your living plant parts need.
How to Propagate a Pink Hibiscus
While you can buy mature Pink Hibiscus plants online, it’s usually easiest to simply create your own from scratch! Once you learn how to propagate a tropical hibiscus variety at home, you can share these gorgeous growers with your friends and family.
The easiest and most common way to propagate a Pink Hibiscus is through stem cutting. Identify a healthy and strong hibiscus stem that you want to cut. Aim for one that’s around eight inches long, and be sure to cut it at an angle. When you do, make the incision directly on a leaf node.
With your stem in hand, remove any top-forming leaves, along with any buds or flowers that may have developed. Once that’s done, you’re ready to plant your stem in your medium of choice. Many plant owners choose to use a container filled with perlite or builder’s sand to give their stem a solid foundation.
Before sticking the stem into the planting medium, dip the cut end in a rooting hormone. This will help it develop roots quicker once it’s planted. Note that if there isn’t enough humidity in your area, you may need to cover the container with a plastic bag or plastic dome to keep your plant from drying out.
Water the planting medium routinely and try to maintain a consistent temperature that doesn’t drop below 70 degrees Fahrenheit or creep above 85 degrees Fahrenheit.
Pink Hibiscus: Common Pests and Diseases
Homeowners aren’t the only ones who love to enjoy a Pink Hibiscus plant! There are several other intruders who love to claim those blooms as their own.
A few of the most common pests that affect this plant include:
- Spider mites
- Aphids
- Mealybugs
- Whiteflies
- Thrips
While you may have heard of spider mites and aphids, mealybugs aren’t quite as common. Still, they can do some major damage if they find your Pink Hibiscus. These bright white bugs are known to create small white spots all over your plant leaves. In this way, they’re similar to whiteflies, which also leave a white mess in their wake.
Whiteflies tend to congregate on the underside of hibiscus leaves. They have an appearance similar to the common housefly and will scatter if you give your plant a good shake. Thrips are thin, black insects that lay eggs in the buds of certain plants, including hibiscus varieties.
Any of these pests could cause great damage to your plant. Spider mites will turn foliage yellow, while aphids will invade your plant with hundreds of tiny, black bugs. To eradicate most kinds of common hibiscus pests, it’s best to take a two-phased approach. First, purchase a plant-safe pesticide.
Following the manufacturer’s guidelines, apply the product to your plant. In addition, you can also clean and prune your plant back periodically to remove any signs of damage or decay and prevent them from spreading further.
Disease-wise, one of the most common and destructive conditions to look out for is dieback disease. If you notice one wilted, droopy-looking branch on a plant that otherwise looks relatively healthy, then this disease could be at work.
In most cases, the decay is caused by a break in the stem’s bark, which opens the bark up to air and allows fungi or bacteria to invade. To prevent dieback disease from damaging your plant again, find the infected stem. Move down about two leaf nodes and make a cut about 1/4-inch above the node.
If you notice any dark streaks on the inside of the plant when you make the incision, then move a little further down and make a second cut. Ultimately, the inside of the plant should be solid white. To prevent the stem from growing and becoming diseased again, you can apply sterile wax to its tip.
Where to Buy Pink Hibiscus Seeds
If you want to try your hand at growing a Pink Hibiscus from seed, then start with these sources:
Where to Buy a Mature Pink Hibiscus
You don’t have to live in a tropical paradise to feel like you just stepped off a boat and onto an island. When you buy a Pink Hibiscus, any part of your property instantly becomes a haven. When you’re ready to bring one home, here are a few online retailers to try:
If you keep your eyes open (and live in the right area), you may even find a Pink Hibiscus plant at a home and garden store. Some Amazon and Etsy sellers also offer mature hibiscus plants in their ecommerce storefronts.
FAQs
Answer: Those massive blooms are impressive, but they don’t last too long. In fact, most only get to have their moment in the sun for about two to three days.
Then, they shrivel and wilt before slowly falling to the ground. If you want to expedite this process and encourage new growth, then you may be wondering if deadheading is the right way to go. The short answer? No.
Deadheading is the process of removing any flowers that have faded, wilted, or simply seen better days. For many plant varieties, it’s a smart idea. First, you’re improving the appearance of your plant and keeping it as neat as possible. Second, deadheading also prevents reseeding.
When it comes to a Pink Hibiscus, however, this is one step you can skip. By pinching off spent blooms, you’re wasting more than just time. You could actually be acting prematurely, preventing the flowers from blooming a little later. Or, you could delay the onset of flowers next year.
Tropical hibiscus plants are actually self-cleaning, so they’ll take care of bloom disposal for you! Once it’s time, the flowers should drop to the ground on their own and new ones will form in their place.
Answer: This answer depends on where you live. If your home is located in USDA Hardiness Zone 9 or below and you receive freezing weather in the fall or winter, then it’s best to cut your Pink Hibiscus stems back in the fall of every year.
When you do so, leave only three to six inches of the stem exposed above the soil. Doing this can help preserve your plant as temperatures dip cooler.
If you live in USDA Hardiness Zone 10 or above, then you may not need to cut your entire plant back. In this case, only snip away any damaged or diseased stems that you see. Remember to sterilize your pruning shears after each cut to make sure you don’t spread the disease from one part of the plant to the next.
Answer: Has your Pink Hibiscus outgrown its original container? If you’ve placed it in the right spot, it might be growing beyond capacity. In most cases, you’ll need to re-pot your plant once every year or two.
Often, your plant will give you signs that it’s time to move up in size. For instance, you may notice that it’s dropping its leaves more than usual, or its growth might appear stunted.
Instead of choosing a new container that’s much larger than your current one, buy one that’s just a little wider in diameter. This way, your plant won’t expend too much energy trying to fill the new space with roots, and can focus on growing outward and blooming!
Answer: If you don’t live in a tropical climate, you’ll need to bring your Pink Hibiscus indoors when cool temperatures begin. This is a smart move, but only if you can continue to provide your plant with the sunlight that it needs to survive. As long as it gets two to three hours of sun per day in the winter, it should continue to grow indoors.
Keep in mind that your plant won’t need as much water in the winter. Still, it’s important to keep an eye on your humidity levels. Arid indoor heat can be damaging to a Pink Hibiscus, so you may need to add a humidifier to keep it comfortable. Shallow waterings and light water mists can also help. While it might be exciting, go ahead and remove any buds that you see forming on your plant over the winter. Once the weather warms up, you can cut the plant back and place it back outdoors once nighttime temperatures stay above 50 degrees Fahrenheit.
Answer: You might not think of your morning cup of java as an ideal fertilizer, but it turns out, the answer is yes! When used as fertilizer, dry coffee grounds can enrich your soil with beneficial nutrients, such as nitrogen and potassium.
If you want to try this approach, you can spread your used coffee grounds out on a sheet of newspaper. Let them sit in the direct sunlight for a few days and you’re good to go! Sprinkle them lightly around your plant, starting at the base and working outward.
Create Your Own Paradise With a Pink Hibiscus
With a Pink Hibiscus in your backyard, you never have to travel far to get a taste of the tropics. Though the impressive blooms on these plants don’t last for more than a few days, they’re a worthy investment and a gorgeous addition to any space.
With this Pink Hibiscus Growing Guide, you’re ready to start this journey with confidence! For more insights on different plant varieties, gardening tools, and more, check out more of our online guides!