- Icebox Watermelon Growing Guide: How To Grow It In Your Garden - August 21, 2021
- Duke Blueberry Growing Guide: How To Start Your Blueberry Garden? - August 21, 2021
- Pink Hibiscus Growing Guide: How To Grow One Easily? - August 16, 2021
The unofficial fruit of summer, watermelons are sweet, juicy, and full of flavor. However, they can also be massive and unwieldy. If you’ve ever lugged one home only to find that there’s no spot to store it, you know the struggle. While some handy homeowners place them over an air vent to keep it fresh, it’s much easier when you can keep it cool in the refrigerator until you’re ready to slice into it. This is where Icebox Watermelons come in!
As their name implies, these fruits are conveniently sized to fit right in your fridge, aka your icebox! Today, we’re sharing all about how to grow them in your garden so you’re never too far from the refreshment they provide.
What Is an Icebox Watermelon?
What if you could take everything you know and love about watermelon and simply condense it?
This is essentially what you get with an Icebox Watermelon. Smaller, juicier, and sweeter than their traditional counterparts, these fruits have deep, red flesh and a dark, ivy green rind. The Brix value of these melons is around 10%, which measures the total sugar concentration in its flesh.
These fruits were first introduced to the United States around the 1950s, yet they didn’t gain real visibility or a true following until the late 20th century. Most grow to be between eight to 10 pounds and tend to mature quicker due to their miniature size. This is in direct comparison to other vine types, which can produce fruit that weighs up to 50 pounds or more!
While they’re obviously much easier to store in your fridge, these fruits also have an advantage: They’re simpler to grow! Icebox Watermelons don’t take up nearly as much space in a garden and require less maintenance, too.
Planting an Icebox Watermelon: A Step-by-Step Guide
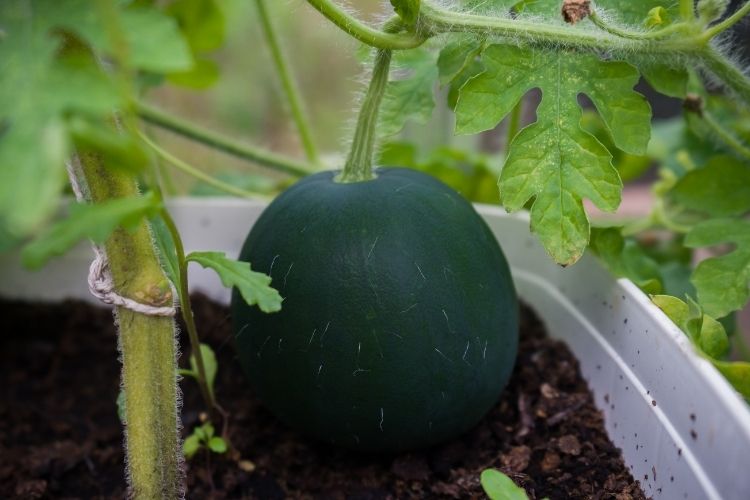
Maybe you’ve planted a sprawling backyard garden with plenty of space for an abundance of crops. Or, you may be working with a small container garden on your back patio or balcony. Either way, you can grow Icebox Watermelons at home as long as you know what these plants need.
Planting From Seed
You can purchase a variety of different types of Icebox Watermelon seeds online or at a local home and garden store. As you browse, you’ll soon discover there are a ton of different options, so let your preferred weight be your guide.
Looking for an Icebox Watermelon that’s around eight to 10 pounds at full maturity? If so, check out these kinds:
- Suck baby
- Blacktail mountain
- Early Crimson Treat
- Navajo Sweet
- Southern Light
If you need something a little smaller, then try these varieties, which should all be under eight pounds:
- Red doll
- Yellow doll
- Little boy
- Petite Perfection
- New Queen
One note? Check your seed packet to determine if the variety you chose is seedless or not. If it’s seedless, then it’s best to plant those plants with other seedless varieties for optimal pollination.
Once you’re ready to get started, begin by checking your location almanac or weather forecast to determine when the first frost will occur in your region. Plan backward from there and start your seeds indoors about three to four weeks before the frost hits. You can simply plant your seeds in a small container filled with potting soil or use a seed starter kit. Place the seed in the bottom of each container and fill it up with about one inch of soil.
Water your seedlings thoroughly to help establish them. Then, place a lid on the container (or the kit) and place it in an indoor location that gets plenty of direct sunlight. windowsill is a great spot! Once the first frost is over, wait about two weeks. The temperature at night should stay consistently above 50 degrees Fahrenheit. At that time, you can safely transplant the seeds into your garden.
Using a shovel or a garden trowel, create little hills where your watermelon plants will be. Each hill should be about two feet in diameter and rows of hills should be five feet apart from one another. Next, dig a hole for each melon that’s only one to two inches deep, making sure the roots are below ground level. Add five to six seeds per hill.
Cover the roots with dirt and carefully water each area. As you plan your garden rows, allocate enough space so that each seedling has three feet of space all around it.
Planting in the Ground
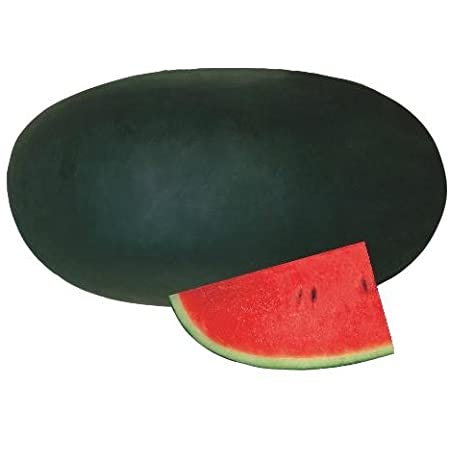
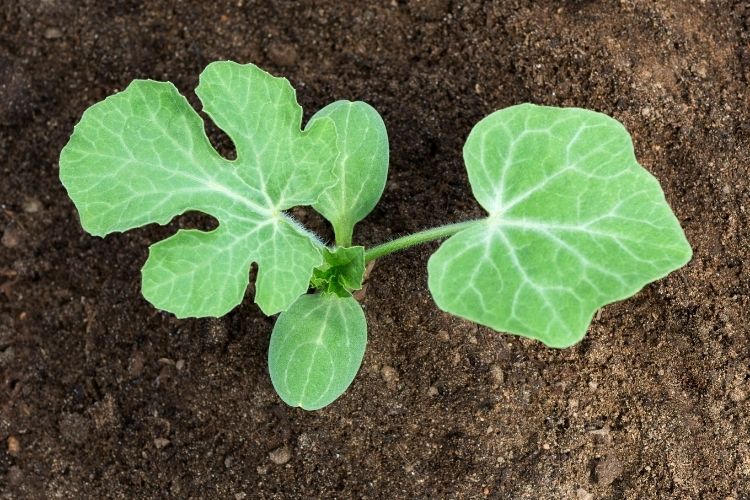
Did you purchase Icebox Watermelon plants from your local nursery? If so, you naturally want to get them on the ground as quickly as possible so they can start growing that sherbert-sweet fruit! Once your nighttime temperatures reach 50 degrees Fahrenheit, you can safely plant them in your garden.
As you would do with seeds started indoors, create rounded hills spaced the same way. You can plant two to three transplants in a small circle on the top of each hill.
While most watermelon varieties are designed to spread as they grow, you can train them to grow vertically if space is at a premium. You can find watermelon trellises designed just for this purpose. These tools are sturdy enough to support the vines and fruit of a compact Icebox Watermelon. As an added bonus, it’s much easier to harvest your fruit this way!
Icebox Watermelon Growing Guide: What Does This Plant Need?
There’s nothing like slicing into a ripe watermelon that you grew all by yourself! To help yours reach full maturity and deliver on expectations, you’ll need to know what this plant prefers. Let’s take a look at the growing conditions that an Icebox Watermelon needs to thrive.
Sunlight Requirements
Icebox Watermelons grow best in full sun. When choosing a garden spot, look for an area that doesn’t get too much shade during the day and isn’t under a canopy of trees.
Ideally, these plants should receive six to eight hours of sunlight per day. If you want to attract more sunlight to them, you can add aluminum foil around their bases, which will also help them ripen quicker.
Soil Requirements
Soil-wise, the main requirement of an Icebox Watermelon is that your spot is well-draining. Before you plant your seedlings in the ground, go ahead and loosen the dirt with a garden tiller to remove any grass or weeds from the area.
Some growers might find that their soil is rich enough on its own, while others will need to amend it with organic matter, such as compost. If you go this route, add at least three inches of the compost to the top of your garden, working it in with a rake or hoe.
At the time of planting, your soil should be at least 70 degrees Fahrenheit. Not sure how to measure the temperature of your soil? This handy guide walks you through the easy steps. If you live in a region that has a short summer growing season, then you can cover your soil with black plastic prior to planting, which can help raise the temperature.
Water Requirements
You can water your Icebox Watermelons with a watering can or a gardening hose. Alternatively, you can create a drip irrigation system or use soaker hoses if your crop is substantial enough to warrant the extra time and expense. This option is ideal, as it keeps the water off the leaves of your watermelon plant. Allowing the foliage to remain damp could lead to mildew and other diseases.
Until the melons mature to roughly the size of a tennis ball, keep the soil consistently damp. This will require daily or even twice-daily watering, especially during the hottest parts of the month. As you water, start at the outside edge of each vine. Then slowly work your way inward until you’ve watered the base of each plant.
Once the fruits have grown beyond the tennis ball size, only water the plants when the soil feels dry. To help your fruit concentrate its sugars (which yields a stronger flavor), slowly cut back on watering and irrigation the week before harvest. During that time, only water your Icebox Watermelon plants if the leaves begin to wilt.
Fertilizer Requirements
The right nutrients can enrich your soil and help your plants thrive. Most watermelon plants (including Icebox varieties) prefer the following types of fertilizer:
- Pine bark
- Pine straw
- Leaves
- Wood chips
Once you have your preferred type, you can add about three to four inches of it around the base of each plant. Doing so will help it retain moisture and keep weeds at bay. Add about two to three inches of fertilizer in between each row of plants.
Harvesting Your Icebox Watermelon
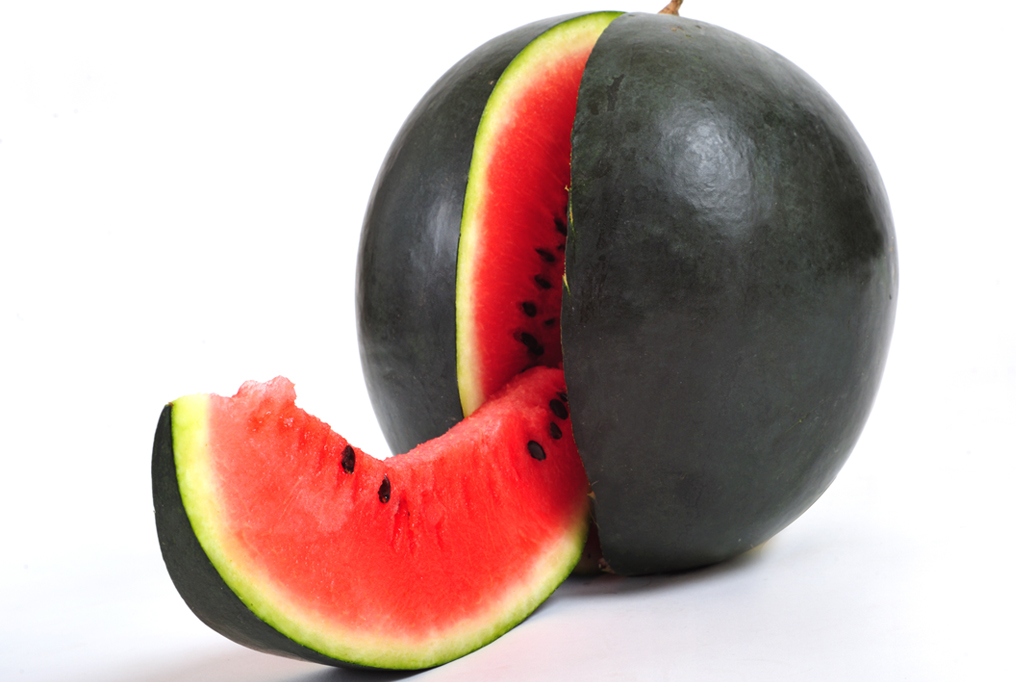
It’s one of the most exciting parts of growing a summer garden: Finally realizing that your fruits and veggies have reached full maturity and it’s time to pick and enjoy them!
That said, how can you know if your Icebox Watermelon is ready to eat?
Put simply, it depends on the type of variety that you planted. If you started your plants from seeds, then you can consult the seed packet for an approximate timeline. If you buy them at a nursery, then be sure to ask the growers what to expect.
As a general rule, most Icebox Watermelon plants will mature 65 to 75 days after you plant them. As you walk through your garden and inspect each one, there are a few telltale signs that will reveal when it’s time to harvest. These include:
- Fully round fruit that weighs between six and 10 pounds
- Dark green leaves
- Dull green rind (not bright green)
- Brown tendril close to melon
- A hollow sound when you thump against the fruit
Icebox Watermelons are also ready to pick when the spot that touches the ground turns to a creamy yellow color. Before this time, that spot will be a greenish-white or a pastel yellow. When you tap against the skin of the fruit, you should hear a low-pitched thud or a deep hollow noise.
To train your ear, tap a few times on an Icebox Watermelon that you can visibly tell isn’t ripe. Those fruits will create a high-pitched sound when tapped. From there, you should be able to distinguish the difference.
Once you notice that the tendril closest to the fruit has turned brown, you’re usually about one week away from harvesting it. To help you keep track of the state of each plant, you can use a weatherproof marker to note the date that the tendril was first browned. Write it right on the rind so it’s easy to track when it’s time to pick.
Resist the urge to simply tug the fruit off the vine, which could damage it. Instead, slowly and gently release it by twisting the watermelon until it naturally breaks free. Or, you can also use clippers to cut the melons off of the vine.
During peak harvest season, visit your garden and harvest the ripe fruit at least two times per week. Otherwise, the plants could grow past full maturity and become rotted on the vine. Before they rot, they’ll usually crack, just go ahead and harvest any watermelons that have cracked or are showing signs of cracking.
If you plan to store your melons for a few days before eating them, then leave an inch of the vine attached when you harvest them. If you cut right at the fruit, it could rot as it sits.
Icebox Watermelon: Common Pests and Diseases
It can be disheartening to do everything right and spend growing time your Icebox Watermelon, only to find that it’s fallen victim to a pest or a certain type of disease.
With these varieties, you’ll want to look out for a few specific buggy invaders. These include:
- Spotted cucumber beetles
- Striped cucumber beetles
- Melon aphids
Spotted or striped cucumber beetles will lay their eggs around the base of your watermelon plants. Or, they’ll dig down to just below the surface of the soil and lay them there. When they hatch, those larvae will feed on the various parts of your fruit, including its roots, stem, and surface.
Similarly, melon aphids tend to feed on the underside of leaves. You may also find them nibbling on the top of your watermelon vine. Both kinds of pests can deplete the plant of the valuable nutrients that it needs to grow. You may find the foliage becomes brown or wilted, or growth could slow.
In addition to beetles and aphids, your Icebox Watermelon could also experience a range of different fungal diseases, including:
- Gummy stem blight
- Alternaria leaf spot
- Downy mildew
- Powdery mildew
Most of these diseases occur from overwatering when the melon plant is allowed to remain saturated for too much time. For instance, if your plant has gummy stem blight, then you’ll first notice dark, watery lesions on your plant’s stem. From there, the stem may split, revealing drops of sticky, reddish-brown goo. Its leaves will also look waterlogged and damaged.
To keep pests away, you can use an organic insecticide found at your local home and garden store. Or, you can spray the bugs away with water, being sure to dry the leaves afterward so water isn’t allowed to sit stagnant on the leaves. If you prefer to create your own defense at home, then the following have been shown to be effective against a range of common garden pests:
- Soap and water solution (one tablespoon soap per quart of water)
- Neem oil
- Natural predators (add ladybugs or green lacewings)
It also helps to swiftly remove any leaves or vines that these bugs have infested, which can help you limit the spread of damage. The same applies to any fungal disease. Remove the affected areas immediately, make sure you’re not watering the leaves, and cut back on your watering time if the plants appear too damp.
Where to Find Icebox Watermelon Seeds

Now that we’ve whetted your appetite, are you ready to grow your own Icebox Watermelons? If so, it’s easy to find online retailers who can keep you stocked with all the seeds you need! Here are a few of the top ones to check out:
If you’ve grown accustomed to products shipped right to your doorstep in two days, then you’ll be glad to know that you can also find Icebox Watermelon seeds on Amazon!
FAQs
Answer: You’ve done the hard part. You grew and harvested your own Icebox Watermelon! Now, how do you store it? Off the vine, this melon variety will keep for two to three weeks, unrefrigerated. To help increase the holding time, you can store the fruit in a cool, dry location, such as your basement. Once you’ve cut into the fruit, you’ll need to refrigerate any uneaten portions immediately.
Refrigerated, the melon can last up to about one week. To save it for even longer, you can use a melon baller to cut the flesh into balls, or you can dice it into cubes. Stick the pieces into your freezer, where they’re always on hand for smoothies, yogurt bowls, and more!
Answer: As mentioned, it’s best to plant your Icebox Watermelon seeds in the ground about two weeks after the first frost is over. However, that doesn’t mean that you’re totally in the clear. There may be subsequent frosts, and even a light one could be powerful enough to kill a fledgling melon plant.
For reference, a “light frost” is one that occurs in temperatures around 31 to 33 degrees Fahrenheit. To protect your baby vines as much as possible, you can cover them with special frost blankets. Or, you can use cold frames found at your local gardening store. Both measures can keep the frigid temperatures away from your plants and help prolong your growing season.
Answer: In most cases, the healthy melon plant will produce two to four Icebox Watermelons. This is true of nearly all varieties. It’s important to note that each vine will produce both male and female flowers, and both genders are necessary to create fruit.
There are usually far more male flowers than female flowers, at a roughly 7:1 ratio. Depending on how big you want your eventual harvest to be, keep these numbers in mind as you buy and plant your seedlings!
Answer: Pruning a young, promising seedling might feel counter-intuitive. Yet, this is a necessary part of being a diligent melon grower. This step helps reduce competition within the plant for soil, water, and sunlight. Put simply, each plant only has a finite store of nutrients, and to grow substantially, fully-ripe watermelon, you’ll need to thin out some plants to allow others the opportunity to thrive.
Yet, you don’t want to approach this part sporadically. Before you begin pruning a watermelon vine at random, consider when you first planted the fruit. Cutting it back too early could lower the total number of female flowers, which are already scarce. If you accidentally remove all of the female blooms, then there will not be anything to pollinate, which eliminates the possibility of fruit.
Keep in mind that pruning will also reduce the dimension of your vines, and could even catalyze the growth of extraneous runners. If this happens, then your plant could produce smaller fruit or even stop producing fruit altogether, as most of its nutrients and attention are now going toward the new vine growth.
For this reason, don’t prune your plant as soon as it begins to fruit. Some of those young melons that you will see shrivel up and die on their own as the larger and more substantial melons take over. If this happens, then you may not need to prune much at all.
When you are ready to reduce the size of your vines, you can do so by removing any diseased, damaged, or yellowed leaves and shoots at the joint, right where they intersect the primary stem. Use clean, sharp gardening shears to prevent the spread of disease.
If you notice any secondary vines that are not supporting any growth, then you can also cut these back at this time. If you want the biggest Icebox Watermelon possible, then only leave about two to three on each vine. Leaving more (around four to five) will usually yield moderately-sized melons.
Answer: Certain varieties of Icebox Watermelons will have seeds, while others do not. For instance, one of the most unique and delicious varieties in this category is the Citron Red Seeded Watermelon!
This fruit gets its name from its trademark red seeds, which pop beautifully against the fruit’s light yellow flesh. A little challenging to find, this fruit is usually used to make preserves and sweet treats, including puddings and fruitcakes. It is similar in color and taste to the equally elusive White Watermelon.
Sugar Baby Watermelons, which are among the most common and popular Icebox varieties, have a very small number of thin black seeds.
Grow Your Own Icebox Watermelon at Home
From picnics and barbecues to family dinners and after-school snacks, few fruits are as versatile and crowd-pleasing as watermelon. If you want a variety that’s manageable, easy to grow, and a cinch to store, then Icebox Watermelon is ideal.
These small fruits are a great way to dip your toes into the water of large-scale summer gardening. If you harvest a great first crop, then you might be ready to work your way up to bigger ones next season! This Icebox Watermelon Growing Guide can help you make sure the setting is just right to produce a healthy and delicious bounty.
Are you looking for more gardening inspiration and resources? If so, then be sure to check out the rest of our online guides!

