
- Icebox Watermelon Growing Guide: How To Grow It In Your Garden - August 21, 2021
- Duke Blueberry Growing Guide: How To Start Your Blueberry Garden? - August 21, 2021
- Pink Hibiscus Growing Guide: How To Grow One Easily? - August 16, 2021
When you picture a hibiscus plant, you likely envision a towering tropical plant with warm-hued blooms. Usually, you find these in shades of pale pink, deep yellow, and even vibrant red.
However, did you know that there is another, cool-toned species of hibiscus that can add a unique and special pop of color to your garden? The blue hibiscus is an elusive and hard-to-find plant, but that only adds to its allure and appeal.
Looking to add a few to your outdoor patio or landscape? Today, we’re sharing a complete blue hibiscus growing guide to help you get started as soon as possible.
What Is a Blue Hibiscus?
Before we dive into the specifics on how to grow one, let’s answer one basic question first: What is a blue hibiscus?
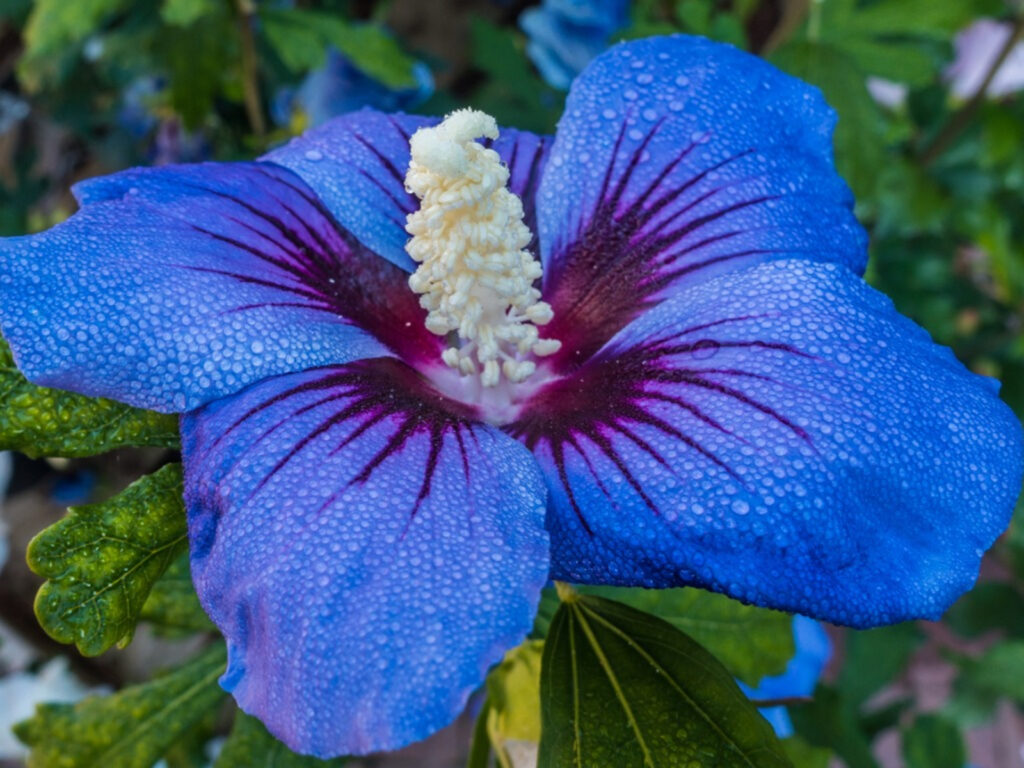
To start, we should explain that this plant isn’t purely blue. Rather, it tends to take on more of a blue/purple shade, with light-colored leaves and a deep, plum center. In some cases, the petals on a blue hibiscus can even be rose-colored or white! One trademark characteristic is the tiny yellow “eye” in the center of the flower.
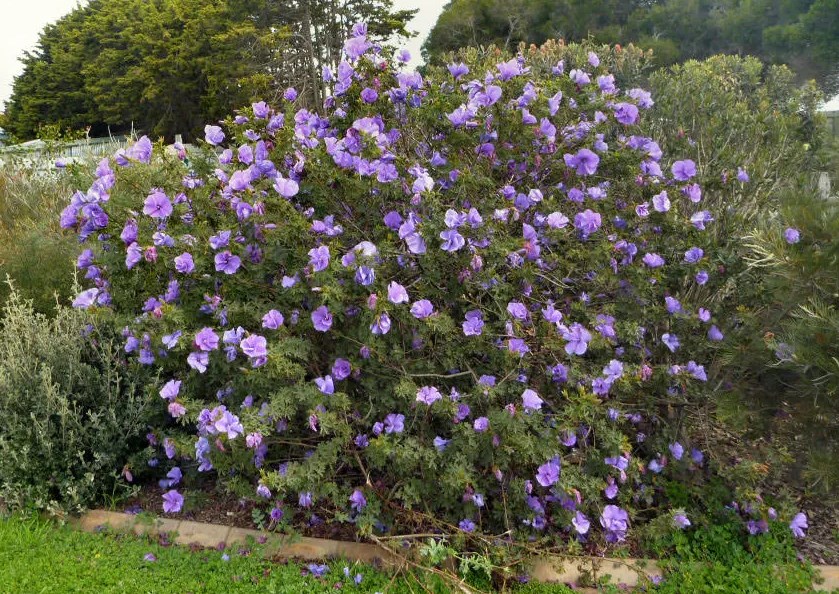
Native to southwestern Australia, a typical blue hibiscus plant can grow between five feet and eight feet tall. Aesthetically speaking, these hibiscuses are more closely related to mallows. Often considered a nuisance and weed to avid gardeners, common mallows, or Malva neglecta, resemble hollyhock. They feature miniature pink or white flowers atop long stems, offset by tiny, wavy leaves.
The blue hibiscus, or Alyogyne huegelii, has larger blooms than mallow but grows in a similar pattern and design. Some botanists have also compared its features to hyssop, juniper, or artemisia. Its petals usually grow up to four or five inches across and are displayed in a distinct trumpet shape. You’ll first notice the initial blooms in late spring and they should continue showing off until early autumn.
Each individual bloom lasts around two to three days before drying up and falling to the ground. However, all types of hibiscus plants, including this one, are noted as prolific growers. As long as you take care of your plant, you should be able to enjoy incredible blooms over a long period of time! It will bloom on and off all year, depending on your climate.
Step-by-Step Blue Hibiscus Growing Guide
Now that you know a little more about this perennial favorite, are you ready to add a blue hibiscus to your own backyard? If so, it helps to know how to prepare the space beforehand. Then, once you’re ready to add your plant, you’ll need to follow care instructions to make sure you’re tending to it properly.
As you get started, let’s take a look at the key steps to take.
Step 1: Decide How You Want to Plant It
Blue hibiscus plants are hardy and do well in even the most challenging, dry conditions. For this reason, they make excellent additions to your mulch beds. They also work well as a border around your flower beds or any other part of your landscaping. To reap the best results, plan to plant the hibiscus in the spring or early fall.
Short on space but still want to enjoy these beautiful blooms? A blue hibiscus will also thrive in a large patio container. Due to its towering size, many homeowners also choose to plant it along walls and fences for added visual appeal.
As you can see, you have plenty of options and layouts to consider! Whichever solution you choose, remember to leave space for your plants to grow. It’s best to leave between three feet to six feet of room around each plant.
Step 2: Look For a Sunny Spot
Once you’ve found the general location where you want to plant your blue hibiscus, the next step is to make sure that spot is properly suited for the task. One important thing to keep in mind about these plants is that they love the full sun!
Knowing this, don’t position your plants in an area where they’ll be shrouded in shade for a substantial part of the day. Unlike many other plants, this is an extremely sun-tolerant variety that actually thrives when it’s super bright out!
As you prepare your space, remember that the blue hibiscus grows best in USDA zones 10 through 12. Make sure you choose a spot that will allow the plant’s roots to grow and its branches to spread out freely. As you’re choosing a spot, remember to allow enough space between the plant and any permanent establishments, such as:
- Home walls
- Backyard decks
- Building foundations
Remember that a super-high hibiscus can act as a window cover, shrouding your windows in near-darkness. Place it somewhere where it won’t interfere with your home’s natural light or interfere with your roof. It should also be spaced far enough away from any nearby powerlines.
Step 3: Check Your Soil Beforehand
Any successful gardener will tell you the same trade secret: A healthy plant is rooted in healthy soil. To help your blue hibiscus grow tall and strong, pay close attention to the type of soil you plant it in. You don’t have to go overboard here, but quality matters.
Your plant will grow well in average soil with medium moisture content. The key is to make sure it’s well-drained so the roots don’t become too saturated and rot.
Step 4: Establish a Watering Schedule

One of the very best parts about growing a blue hibiscus? You don’t have to get out the heavy pail and water this plant every day! As long as you commit to giving it a good douse every few days or so, you should be fine.
After some time goes by, you can use your finger or a garden tool such as a hand trowel to test the soil and see if it’s dry. If it feels like it can use a little more moisture, feel free to water on demand. To accurately check the soil’s moisture content, dig a small hole in the plant’s soil and take a good look at it. If the first few inches (two to four) are dry, then you’ll know that it’s time to add water.
Not sure how to gauge it? You can check your region’s average precipitation rates to determine if you’ll need to water more or less.
If your area gets particularly hot, especially in the summer, then it’s better to give the ground a slow, solid soak than to drench it with water over a short period of time. You can set up a garden hose to give it a one-hour trickle one time per week, and that should do the trick. During very hot spells, try to soak the ground up to eight centimeters every few days. Taking the time to fully saturate the soil like this is better than watering your blue hibiscus just a little bit each day.
This approach is called deep watering. It encourages the roots of the plant to grow deeper into the ground. The result is a hardier plant with vibrant blooms, ready to tolerate even the driest climates.
Step 5: Prune Lightly as Required
Another great aspect of owning a blue hibiscus is that these plants don’t require extensive, fussy pruning. Once those first blooms appear in mid-to-late spring, you can take a very relaxed approach to keep the plant trimmed.
Just keep an eye on the hibiscus to see if any unsightly shoots have appeared on the plant. If you notice any, then cut them off. Doing so allows the hibiscus to “breathe” a little easier and can promote healthy plant growth.
Tips for Planting a Blue Hibiscus
When you’re ready to dig your hands in the ground and start planting your blue hibiscus, you can easily do so in just a few steps. Let’s take a look at the process to follow.
Digging the Hole
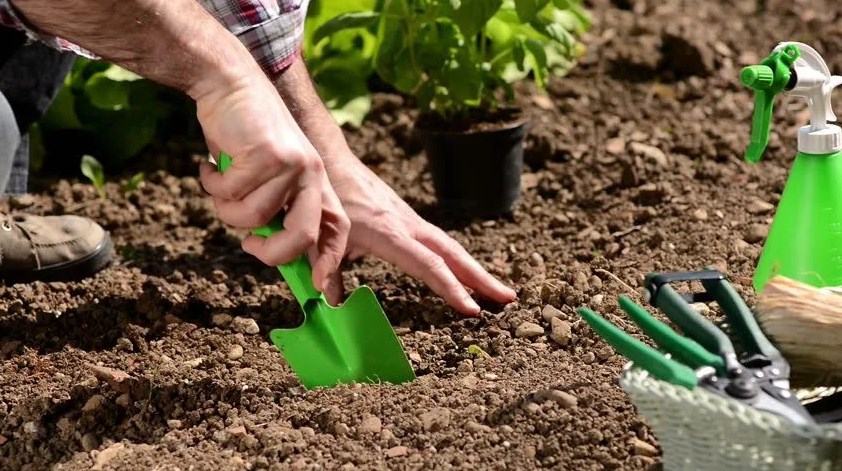
First, start by digging the hole in the spot that you choose. The hole should be as deep as the plant’s root ball, and three times as wide as it. Mix the soil that you remove with a little compost or peat moss.
This simple addition serves two purposes. First, it helps put nutrients back into the soil. Second, it helps loosen the existing dirt, allowing the plant’s new roots to spread out more easily.
Removing the Plant
Most gardeners choose to plant a blue hibiscus from a starter plant. If you go this route, you might wonder how to get the delicate baby bloomer out of the container without damaging it.
To do so, gently tip the base of the container sideways, being careful not to spill any of the dirt or cause the hibiscus to topple. Then, gently tap the outside of the container to ease out the root ball. If it doesn’t slide out, you can carefully rotate the container and continue tapping until the soil is effectively loosened.
Did you try all the tapping and turning that you can muster, but the plant’s still stuck? In that case, you can use a pair of scissors to cut the container down the side.
Planting the Hibiscus
Once the plant is out, you can set it into the hole you dug. Sometimes, you’ll notice that the root ball will be wrapped in a thick burlap-style fabric. This is used to help the starter plant retain moisture when it’s watered. Remove that covering, along with any other strings or wires that might be holding it in place.
At this point, the roots should be gently loosened and ready to plant. If you notice that they’re packed very tightly, you can use your fingers to softly rake them apart. Once the root ball is securely in place, return the nutrient-enriched soil back to the planting spot.
Pack the soil snugly around the root ball, filling in the hole until the soil hits right at the plant’s base. The roots should be fully covered, especially where they expand out from the main stem, but there’s no need to overfill the space.
Initial Watering and Mulching
As mentioned above, you will eventually create and stick to a regular watering schedule to keep your blue hibiscus well-nurtured. However, the initial watering is a little different.
As soon as the soil is in place, water the plant thoroughly. Then, top the soil with a thin layer of mulch. You don’t need more than around two inches of mulch and look for a natural one, such as shredded bark. Synthetic varieties, such as mulch made from rubber tires, might look great but can keep water and essential nutrients from reaching the base of your plant.
As you add the mulch, resist the urge to add more than you need. It’s especially important to keep the trunk of your hibiscus free and clear. Mulching all the way inward can put too much moisture into the bark when you water it, which can cause it to decay over time. As long as you leave a circumference of around four inches, you’ll be fine!
You’ll need to monitor your blue hibiscus and keep a close eye on it for the first few years. Then, once you’ve established a good watering schedule and your plant is sturdy, you can take a more hands-off approach and allow it to thrive on its own.
Fertilizing a Blue Hibiscus
You know that certain types of fertilizer can turn your lawn from crispy and brown to lush and green in just a few applications. Yet, do you really need to fertilize your landscape plants, too?
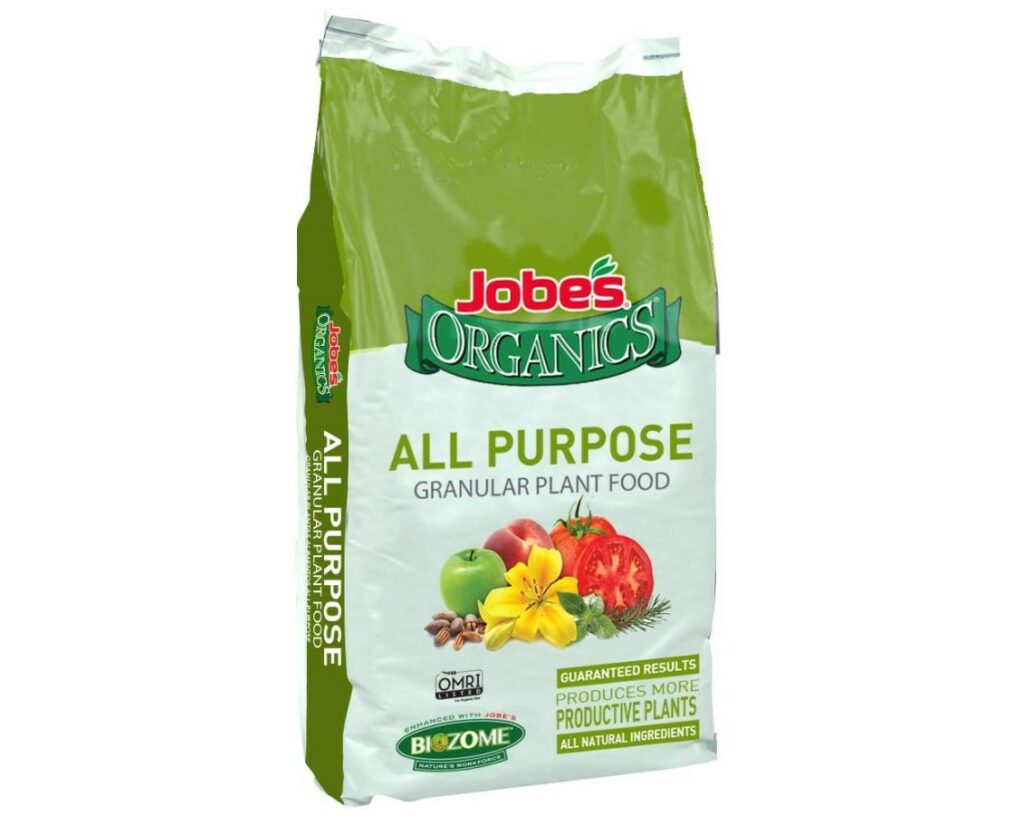
If you want your blue hibiscus to showcase those gorgeous blooms, it’s usually best to do so. Thankfully, you don’t have to tackle this chore every year. Once your plant is established, you can fertilize it every two to three years. If possible, take care of this step early in the spring, when the plant shows its first signs of growth.
As you browse your local home and garden store, you’ll soon find that there isn’t a one-size-fits-all type of fertilizer that will work on every hibiscus plant. Rather, there are many different types, including:
- Slow-release fertilizers
- Granulated fertilizers
- Organic fertilizers
- Synthetic fertilizers
- Liquid feed fertilizers
A local lawn care expert can examine the state of your plant and let you know which type of fertilizer you need. Look for one specially designed to be appropriate for trees and shrubs. If in doubt, a general-purpose fertilizer such as 10-10-10 should be adequate. When you’re ready to apply the fertilizer, be sure to read all of the labels and follow the instructions carefully.
In your quest to have the brightest blooms on the block, it’s easy to get over-zealous and apply too much fertilizer. Doing so can cause your plants to suffer short-term or even permanent damage. It’s also important to pay close attention to the recommended application schedule and apply the fertilizer at the right time of the year.
Frequently Asked Questions
We know it can be so disheartening to bring a beautiful hibiscus home, only to watch it wither a few days later. If you still have lingering questions about how to care for your new plant, these Q&As should clear them up!
Answer: We understand wanting to double-check on the sunshine requirements! Most plants need a healthy mix of sun and shade, but the blue hibiscus isn’t one of them. For their blooms to reach their highest potential, they need at least six solid hours of total sun per day.
While you can still have a perfectly healthy plant in partial shade, keep in mind that its trademark blooms won’t be nearly as full or as spectacular.
Answer: You went to check on your blue hibiscus and to your dismay, you notice that it’s drooping and its leaves have turned brown. What’s going on? When this happens, it usually means that one of three things is going on:
• The plant isn’t receiving enough water
• The plant is receiving too much shade
• Your region experienced a sudden cold spell
All of these issues are enough to cause even the healthiest plant to fall victim to an early death. If you notice that your hibiscus is losing its leaves, this could point to a recent change in the weather or altered soil content. Remember that sometimes, a plant simply dies due to poor overall health and general decline.
Answer: Not crazy about buying pre-made commercial fertilizer? We get it! It’s always best to go green when you can. In this case, did you know that coffee grounds can actually do the trick?
While they might seem like an unlikely choice, the nitrogen and potassium in the grounds are super healthy for your hibiscus! All you have to do is spread the loose grounds on a piece of newspaper and dry them for a few days in the sunlight. Then, sprinkle them all around the plant, starting at the trunk and working your way outward.
Answer: Once you invest the time and energy into caring for a blue hibiscus, you naturally want its eye-catching blooms to last as long as possible. To keep it healthy for as long as possible, there are a few steps you can take.
• First, try feeding it. If you notice that your plant is looking a little dull, invest in good-quality plant food and follow the instructions for application. These foods are often rich in nutrients that your plant needs but can’t always get from nature.
• Then, make sure the soil is adequately moistened and drained, and remember to stick to your watering schedule. You can also dead-head dried blooms to make the way for new growth! If you notice that pests have invaded your plant, you can also spray it with organic pest control products to defend its leaves and blooms against unwanted invaders.
Answer: Want to plant a few blue hibiscus plants around your home but worried about how your four-legged family members might react? In most cases, there’s no need for alarm. A majority of hibiscus plants are non-toxic to dogs. However, both the stems and the blooms are poisonous to cats so keep that in mind and choose a planting location far away from their favorite play space!
One important exception is the Rose of Sharon hibiscus (Hibiscus syriacus), which can be dangerous for your furry friend to ingest. If a pup gets ahold of a large amount of Rose of Sharon, then it could experience a range of symptoms including:
• Diarrhea
• Nausea
• Vomiting
Enjoy Your Beautiful Blue Hibiscus
This summer, break free of the pink-and-red rut and indulge in a flowering plant that’s totally unique! Our blue hibiscus growing guide includes all of the details you need to know when you’re ready to add one to your outdoor collection.
From prepping and planting to watering and fertilizing, there are a few critical steps to follow if you want to enjoy those gorgeous blooms as often as possible. Then, once you give your little bloomer a solid foundation, you can step back and admire its beautiful growth all year long!
Looking for more garden guides to help you make the most of your outdoor space? Feel free to take a look at our other helpful posts for insight and inspiration!